Follow the instructions below to learn how to setup Windows Hello on your PC.
After your initial device login, a Windows Hello pop-up will prompt you to set up a
biometric login and 8-digit pin. Windows Hello is a more personal way to sign in, using your face,
fingerprint, or a PIN. The set-up wizard takes less than 5 minutes and walks you seamlessly through the
steps.
The use of biometrics is completely voluntary, so you can choose ‘Skip for Now’ and create
your PIN.
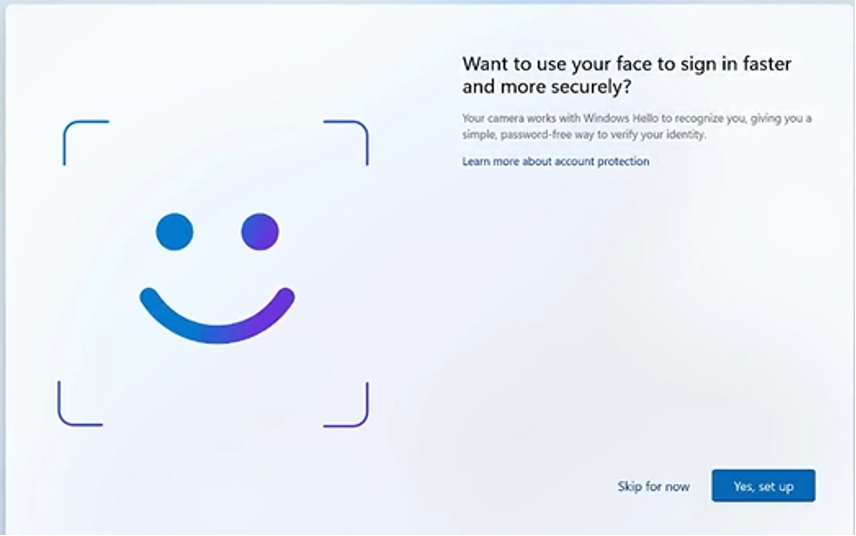
This screen will appear asking if you’d like to set up Windows Hello for Business. If
you’d like to do so, ensure that your Webcam is open (no red dot) and click Yes, set
up.
You can select Skip for Now (go to Step 4 here to set up your
PIN). Click here to learn more about Windows Hello for
Business.

Your webcam will automatically start, keep looking at the camera. If you change your mind, you can still click Skip for now.
When setup is complete, a confirmation message is displayed. Click Next.
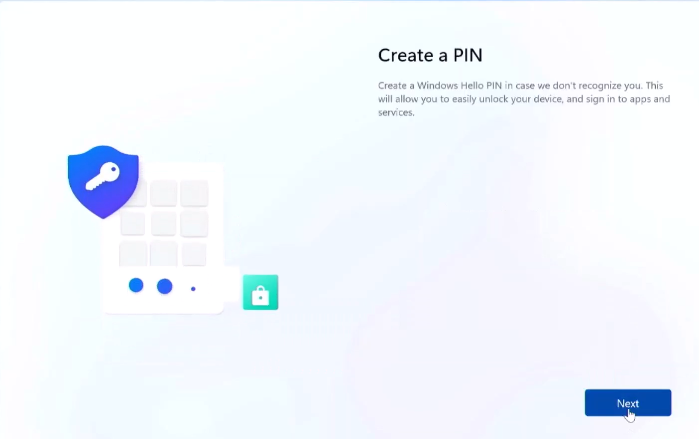
Now, you’ll create a PIN. If you choose not to use the facial recognition, then you will be able to log in with your PIN. Creating a PIN is a required step. Click Next
Enter your J&J email address and type your Temporary password and click Sign On.
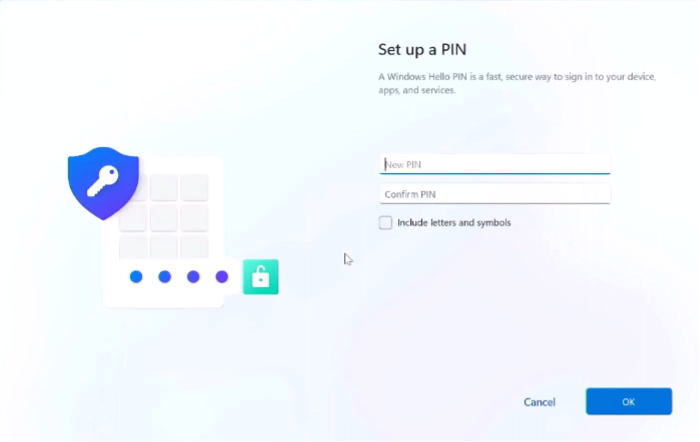
Decide what you’ll use for your 8 digit PIN and check the box if you’d like to include letters and symbols. Enter your New PIN and enter it again to confirm. Hit OK.

You’ll receive confirmation, click OK.
To submit a request, report an issue, or read articles, use the technology self-service center. If you can't access the portal, call the Global Service Desk for help with your migration.
