Follow the instructions below to setup to your iPad.
Most Apple iPads ship from suppliers globally using Apple's Device Enrollment Program.
This streamlines the out of box experience and forces enrollment into J&J's Mobility Service. To
initially set up your iPad, follow the below instructions
Note: Below
steps are only applicable during the first-time setup.
A few things to note before starting:
Power on device. The Power button is located on the top right of the device, press and hold until device powers on.

Swipe UP on the screen that says HELLO.
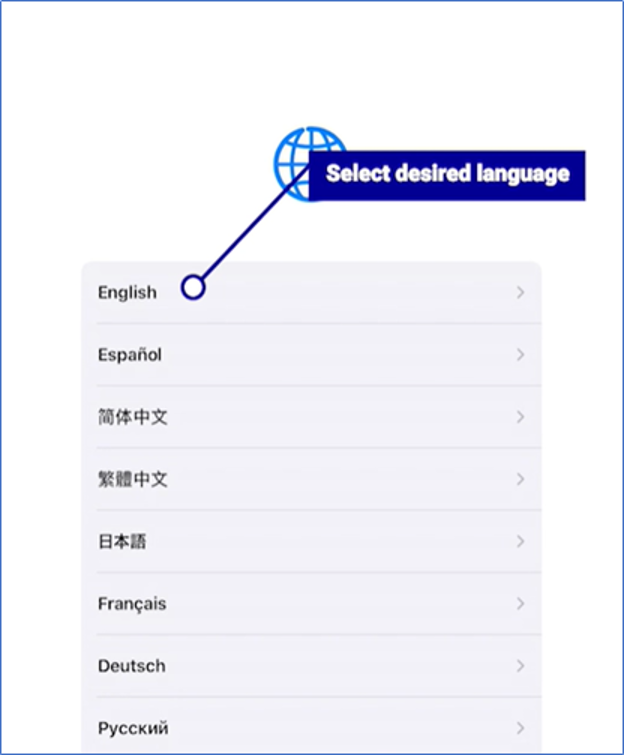
Select ENGLISH as desired language.
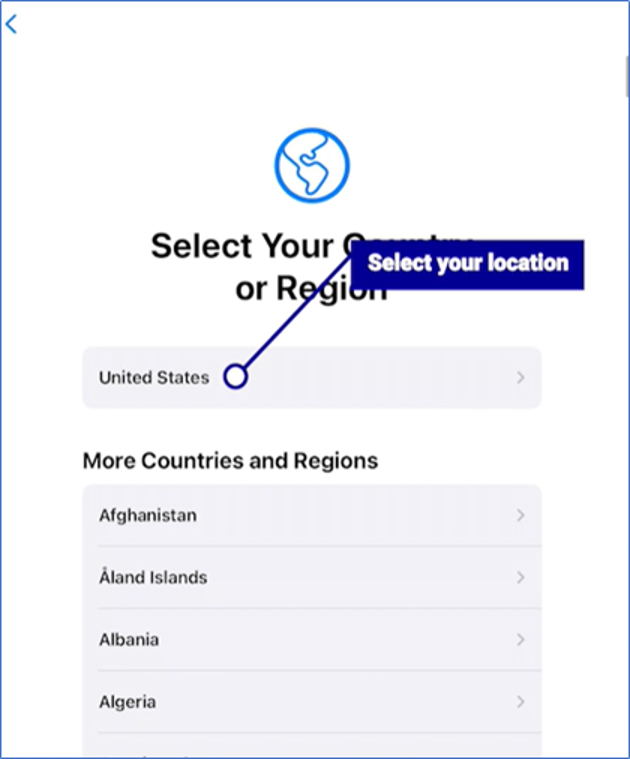
Select UNITED STATES/CANADA as desired region.
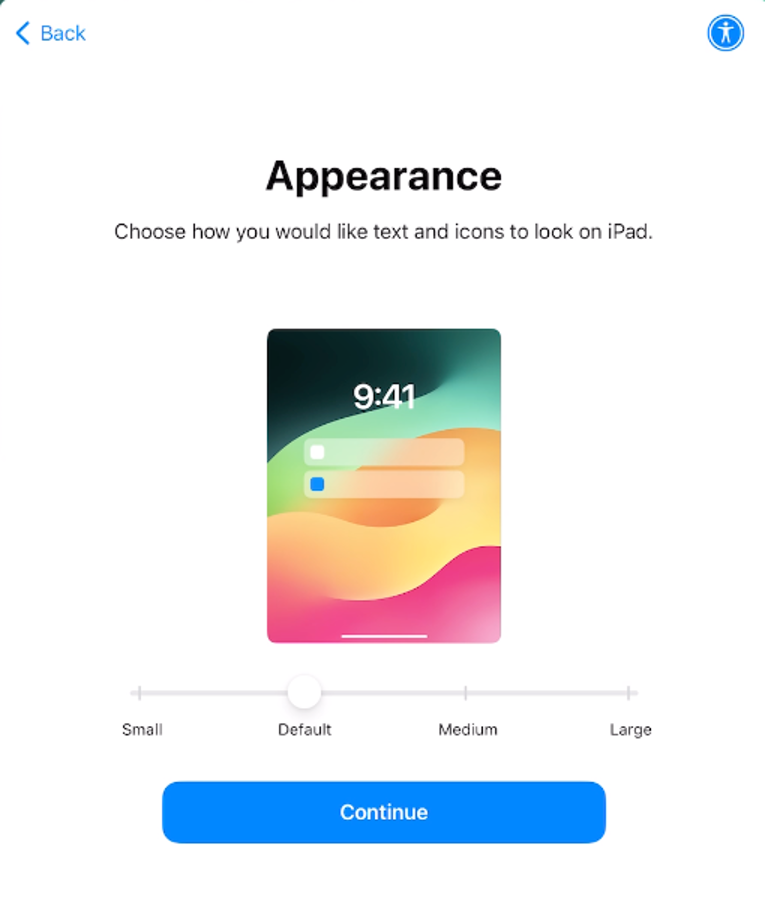
Select your desired Appearance.
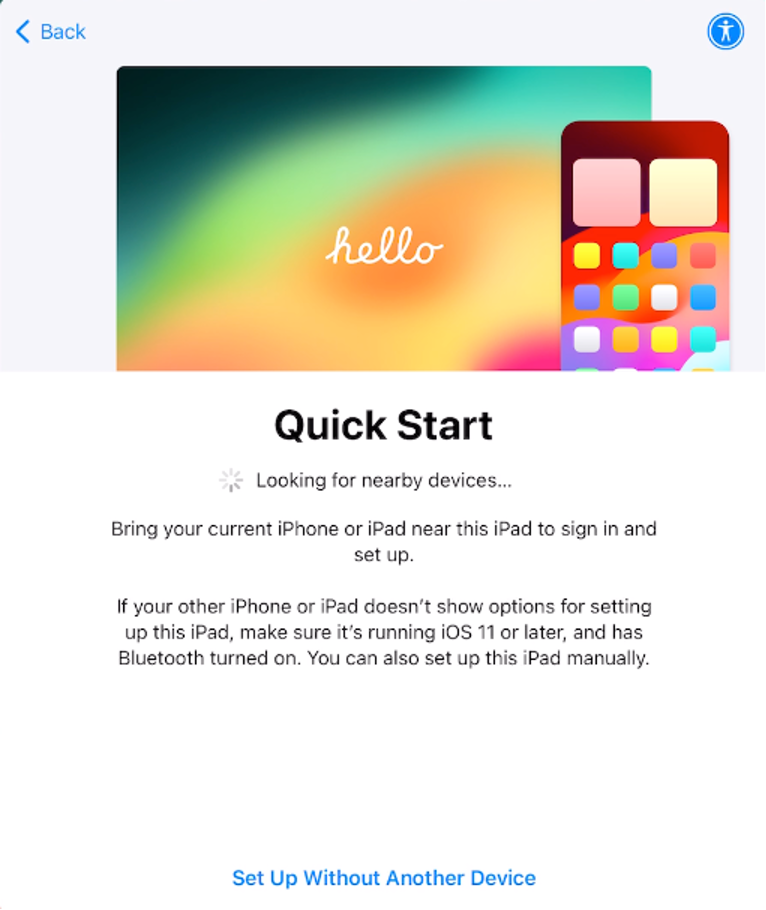
On the "Quick Start" Screen, Select "Set Up Without Another Device"
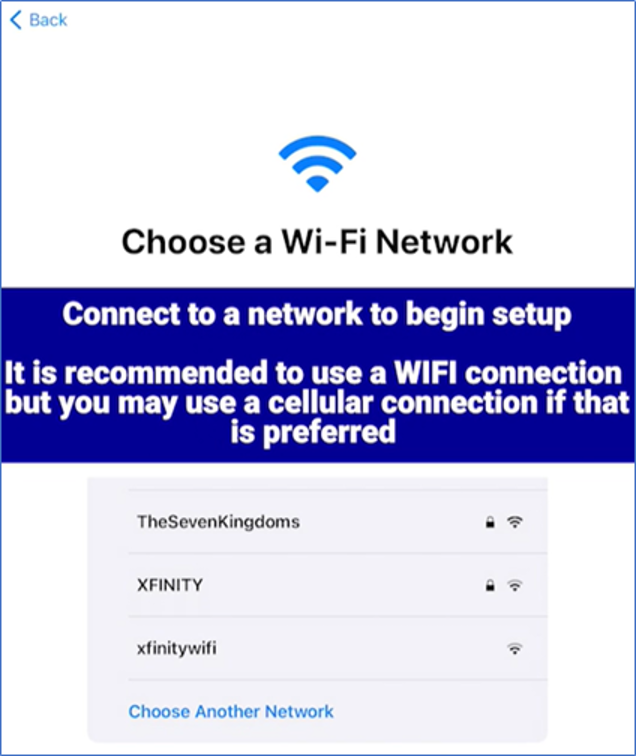
Connect to Wi-Fi.
Note: If you wish to use cellular data instead of
Wi-Fi, please continue to STEP 7b. However, it is recommended to set up Wi-Fi during initial setup.
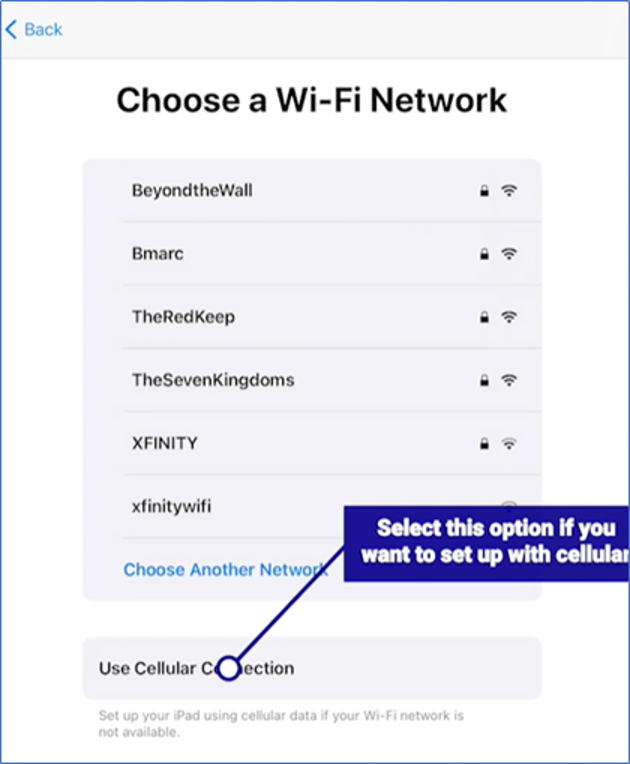
Scroll DOWN past the Wi-Fi networks and select CELLULAR DATA
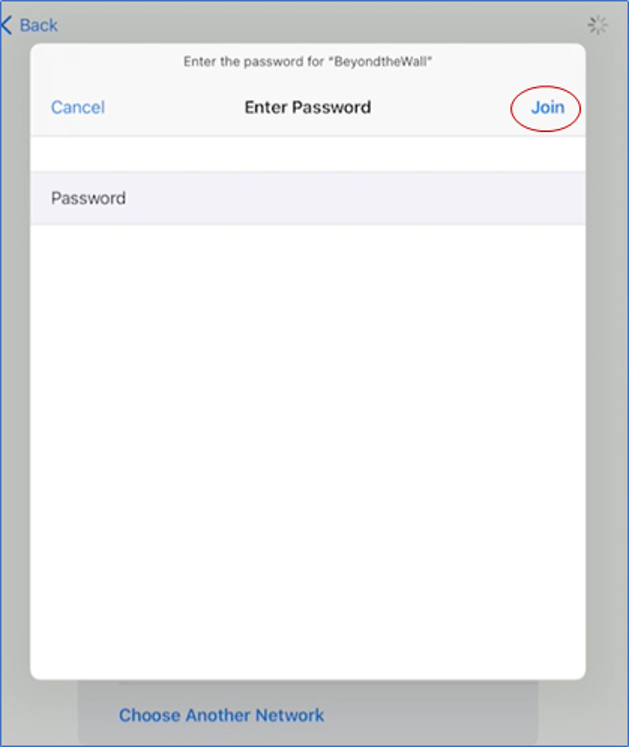
Once you select your Wi-Fi network, you will be prompted to enter its password. After doing so, click JOIN on the top right of the page.
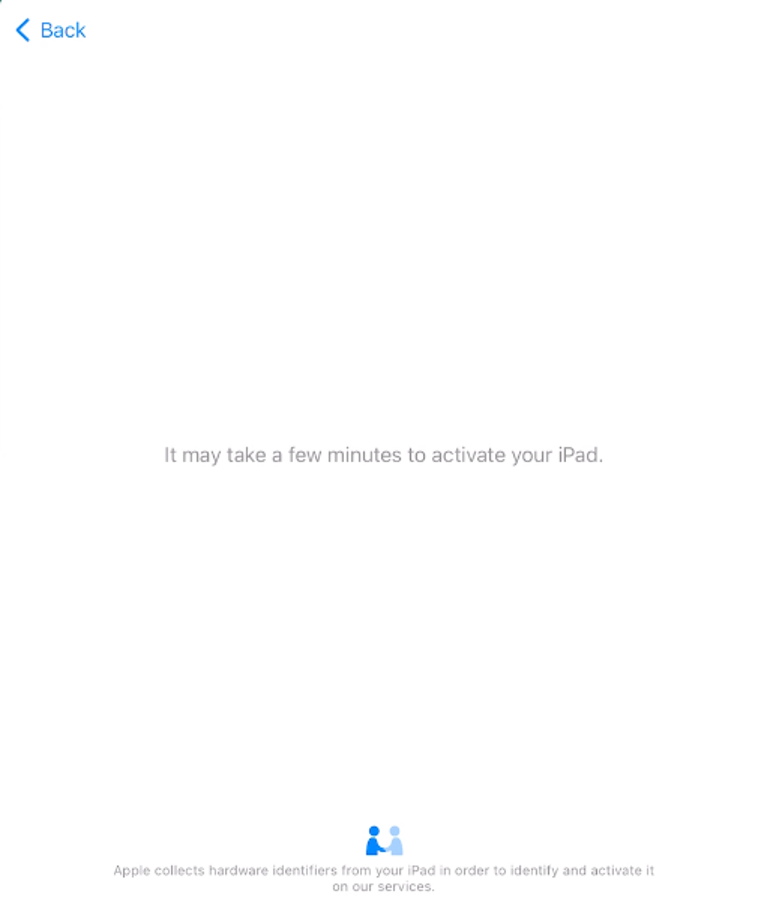
Wait on the "It may take a few minutes to activate your iPad" until
activation is complete.
Note: This step may take a few minutes to complete. You will automatically
be routed to the next step once complete.
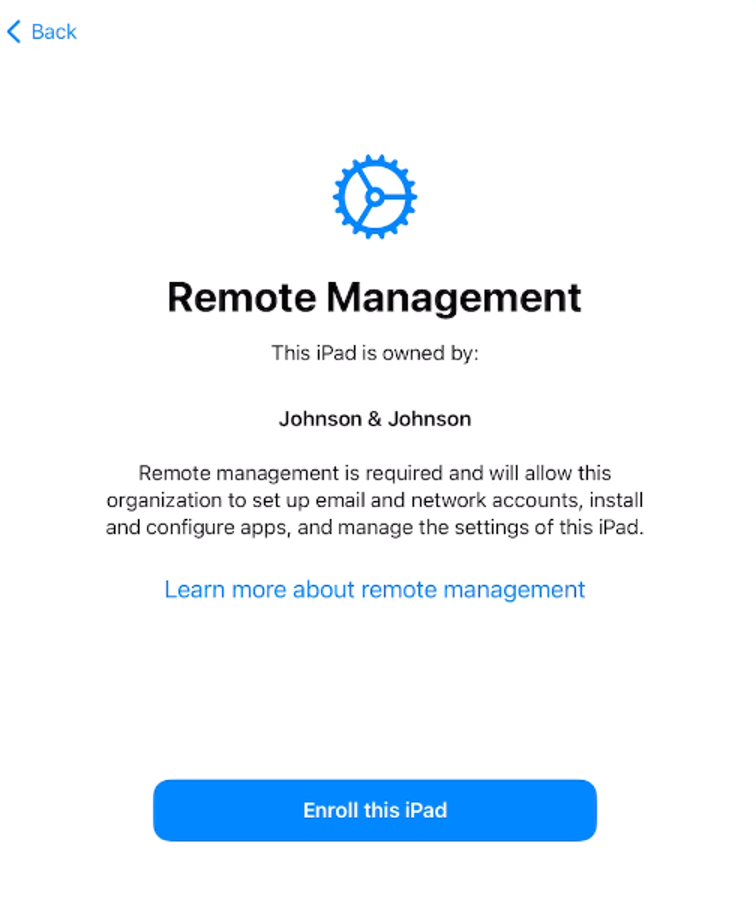
Remote Management will appear on your screen; select Enroll this
iPad
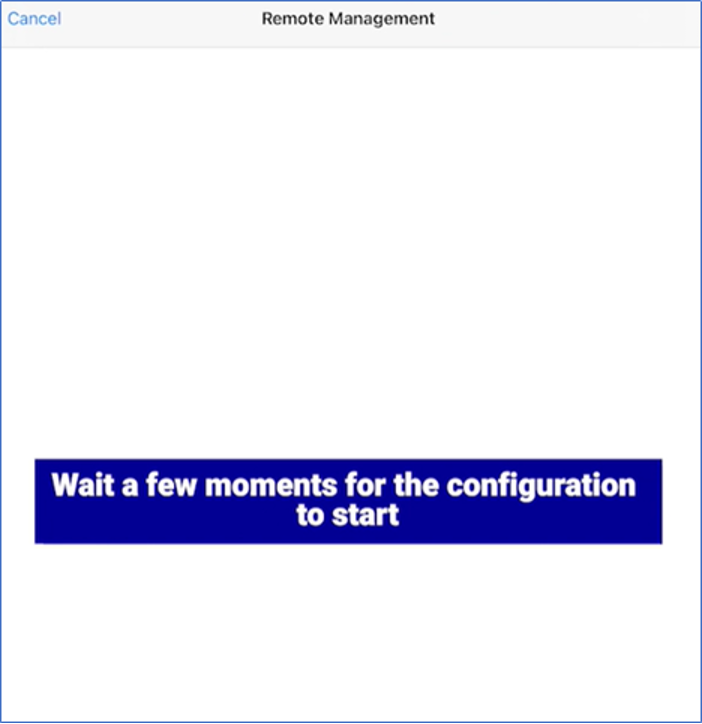
Wait a few moments for the configuration to begin.
Note: Your screen
will appear blank before prompting you to the Johnson & Johnson credentials.
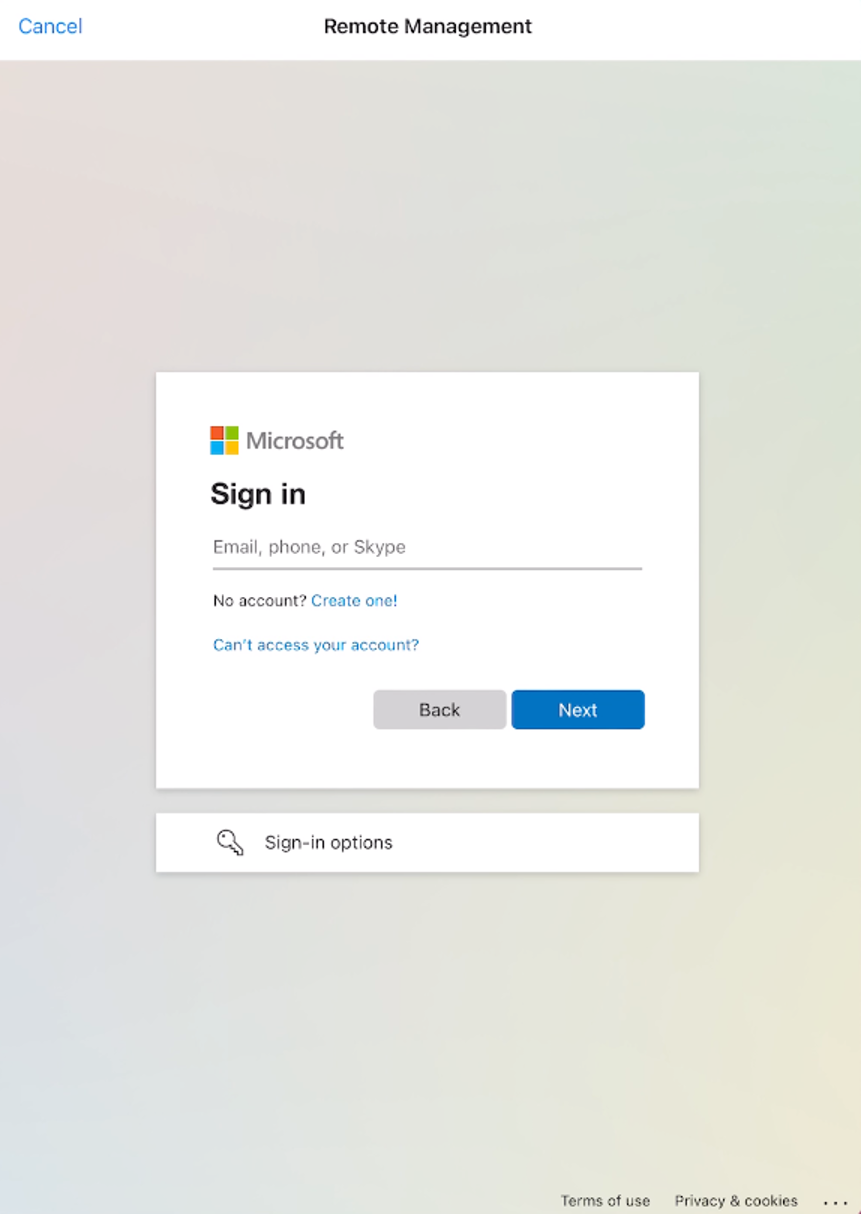
Input your J&J email address and click Next.
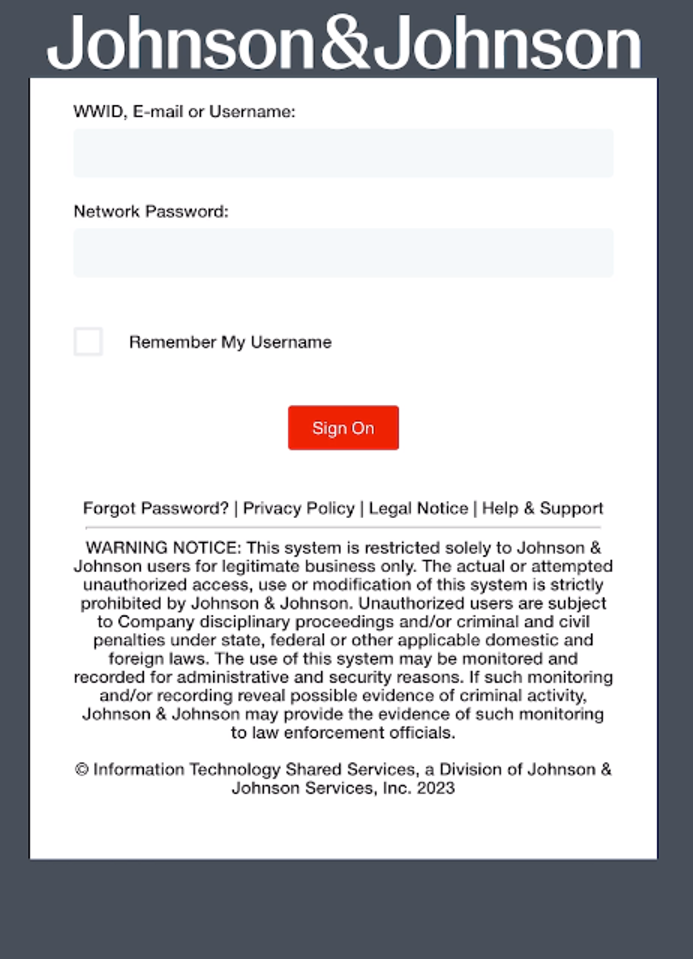
On the Johnson & Johnson sign in screen enter your J&J credentials and
complete Ping ID authentication.
Note: It will take a few moments for your iPad to finish the
signing in and the screen will be blank before routing to the next step.
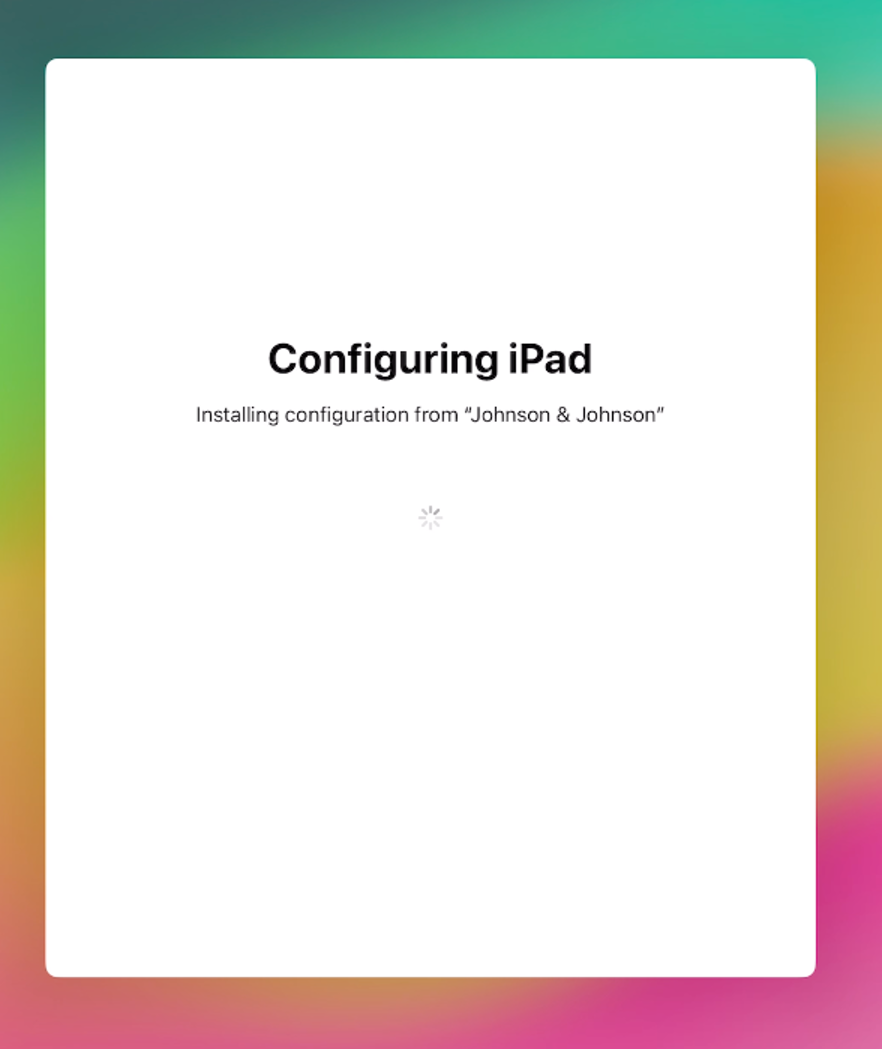
On the "Configuring iPad" screen. wait for the configuration to
complete.
Note: It will take a few moments to complete the configuration.
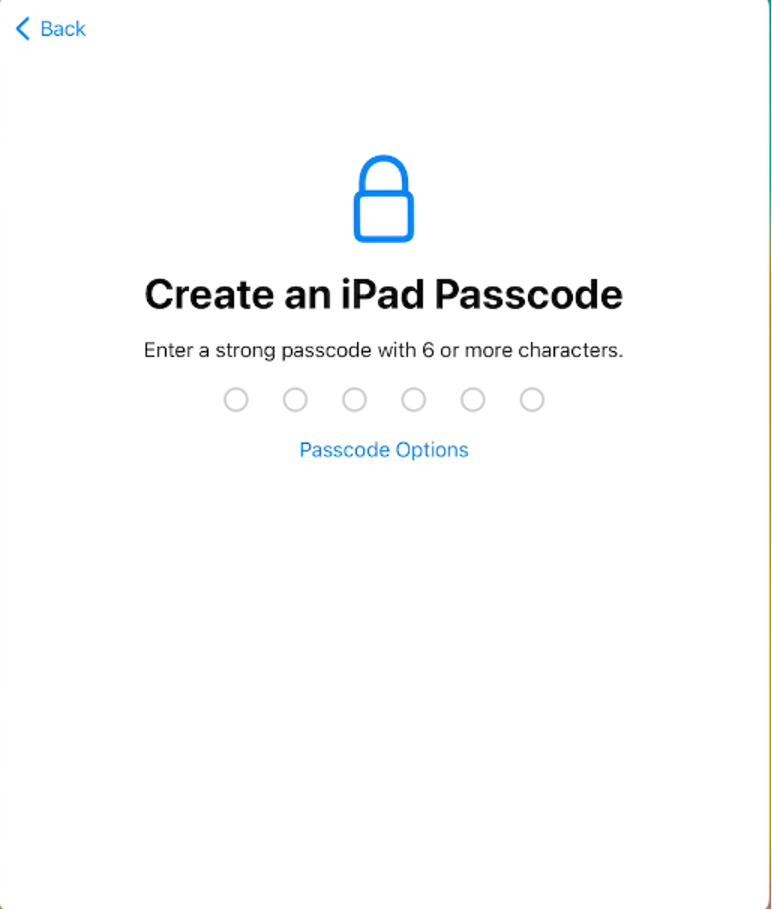
Create a passcode for your device and then Enable location
services.
Note: After completing these steps you will be routed to the home screen.
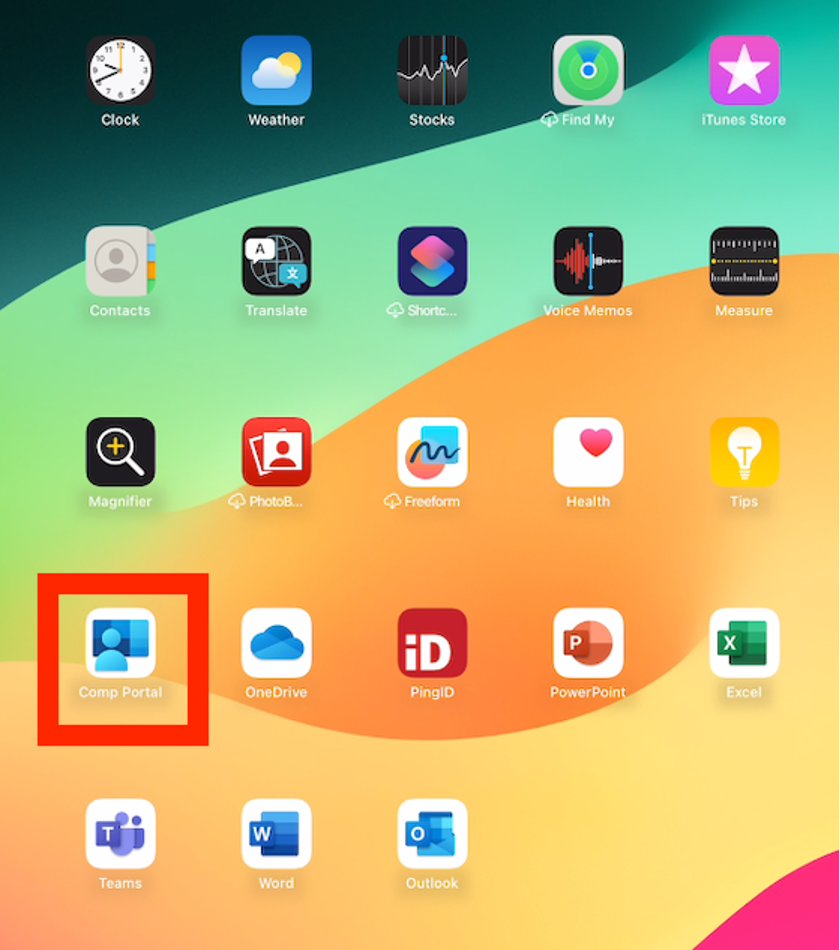
Open the Company Portal app and sign in.
Note: the company portal app,
Ping ID and other core Microsoft apps(ie. Outlook, Teams, OneDrive) will install automatically. They may
take up to 5 minutes to install.

Enter your J&J email address and tap Next.
On the Johnson & Johnson sign in screen enter your J&J credentials and
complete Ping ID authentication.
Note: It will take a few moments for your iPad to finish the
signing in and the screen will be blank before routing to the next step.
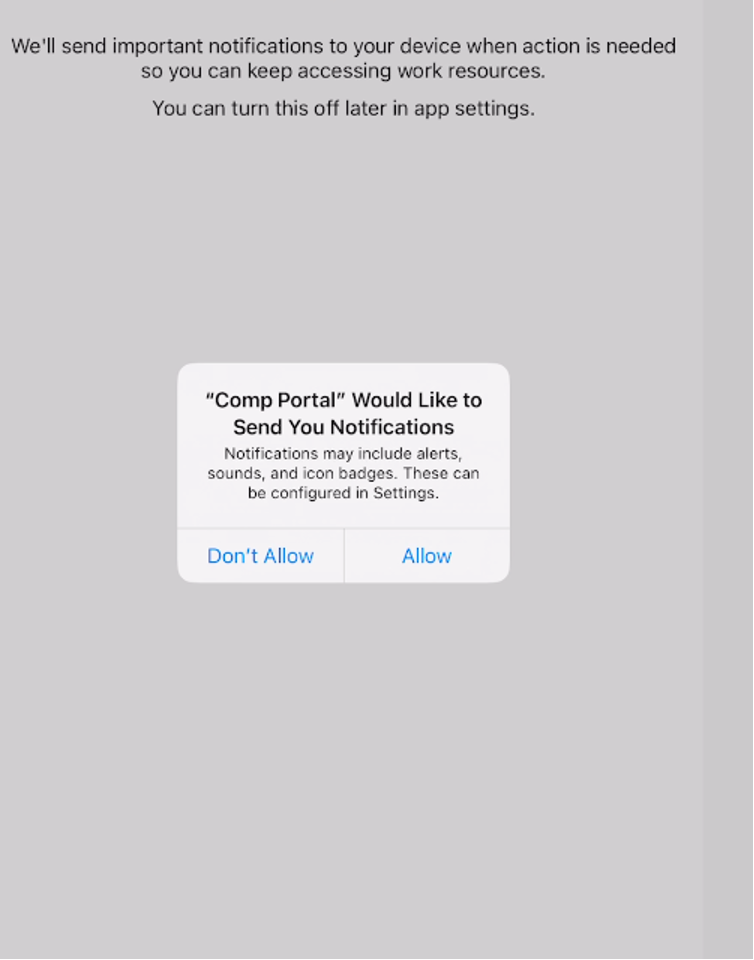
Tap 'Ok' on the "Get notified so you don't lose
access' screen and allow notifications
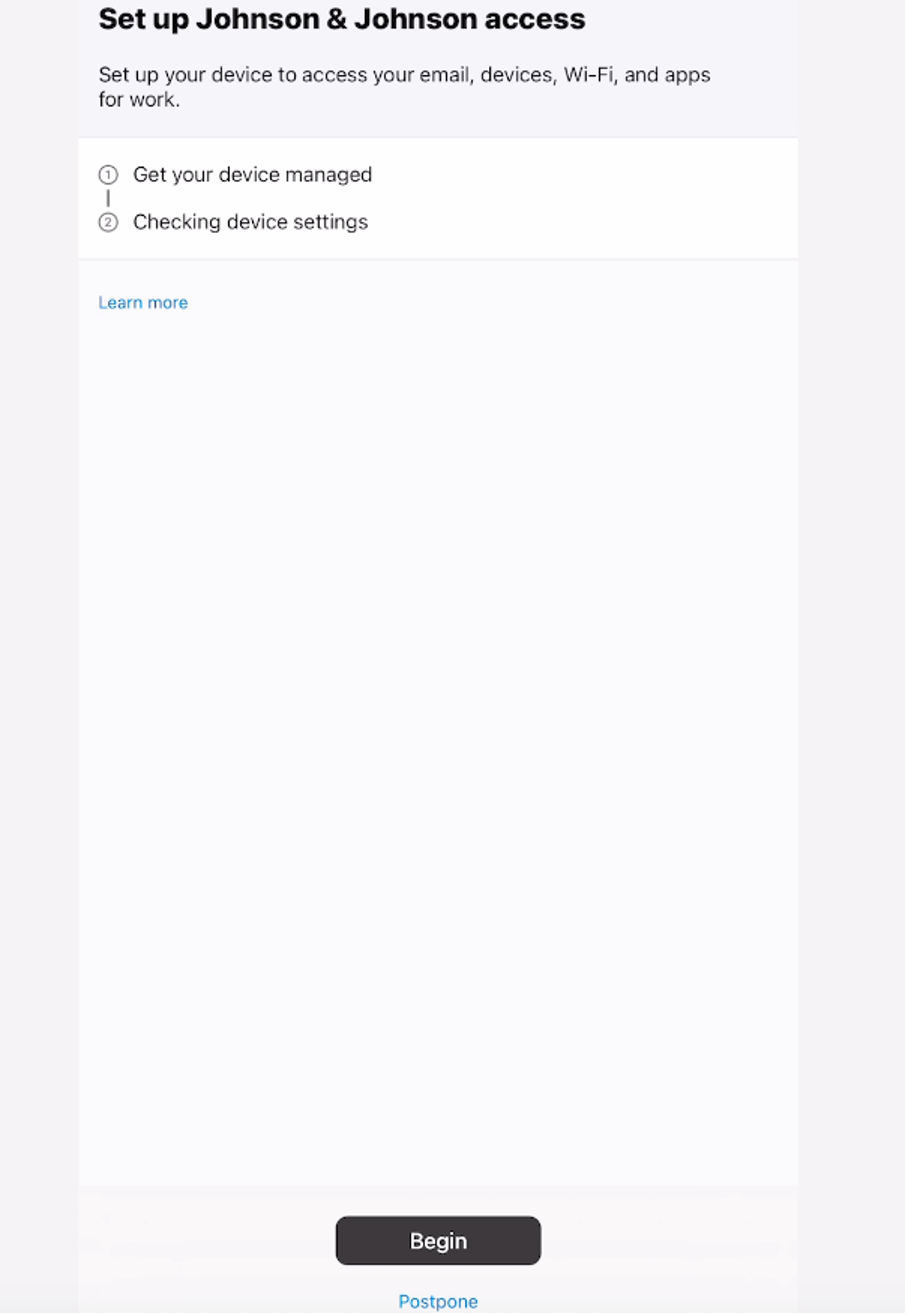
On the "Set up Johnson & Johnson access" screen tap begin and
then tap "Done" once complete.
Note: this step may take a few minutes to complete.

Tap View all apps and install any apps needed.
Note: The company portal
app is where you will view, download and install J&J apps moving forward.
Go to settings
Sign into the iPad with an Apple ID
Note: DO
NOT use a J&J email address since J&J does not provide support for Apple IDs at this time.
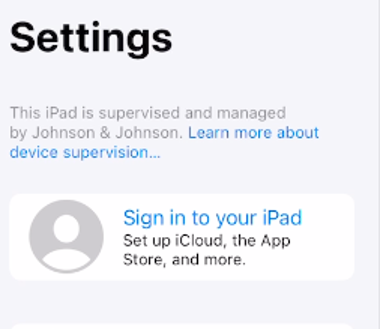
Tap on "Sign in to your iPad"
Sign in with your Apple ID. Do
not use an Apple ID that uses your J&J email address. Use an Apple ID that is set up to use a personal
email address.
Here are a few guides on what to do after the iPad has been setup with Intune Company Portal:
To submit a request, report an issue, or read articles, use the technology self-service center. If you can't access the portal, call the Global Service Desk for help with your migration.
